In this article, we will take a closer look at all aspects of page markup, take a closer look at all the components of this parameter.
Page Orientation Metrics
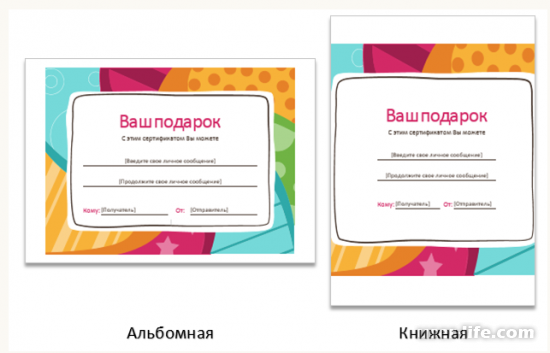
In the process of creating a document, the user has the option of choosing a page, depending on its orientation. There are 2 options - this is a book type or landscape. If you select the landscape orientation type, the page layout will be horizontal. In case of choice book version- the page will be vertical. Below you can see the difference between the two variants of this orientation.
Page orientation change process
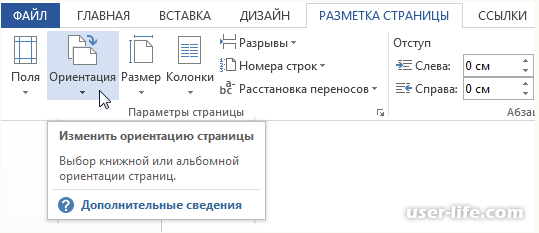
First you need to go to the "Page Layout" tab. Next, you need to find "Page Setup", and then click on "Orientation".
In the menu that appears in front of the user, you must click on the desired type of page orientation: Portrait or landscape.
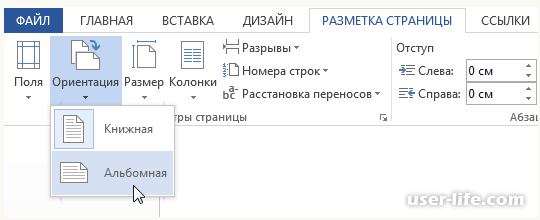
After these steps, the appearance of the page will change.
Changing fields
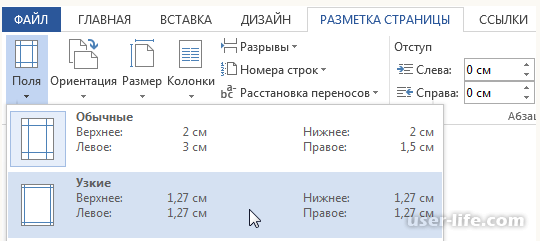
The space between the text and the edge of the file is called a margin. Word has "Regular Fields" set by default. If you need to set the necessary field parameters, this is easy to do.
Field Formatting Procedure
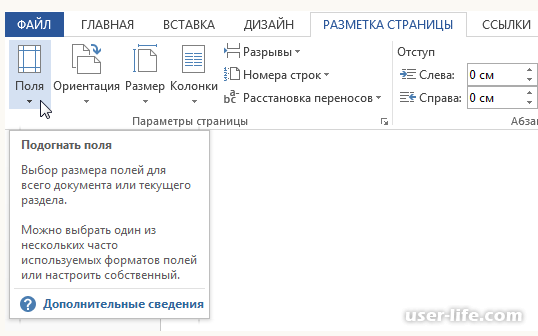
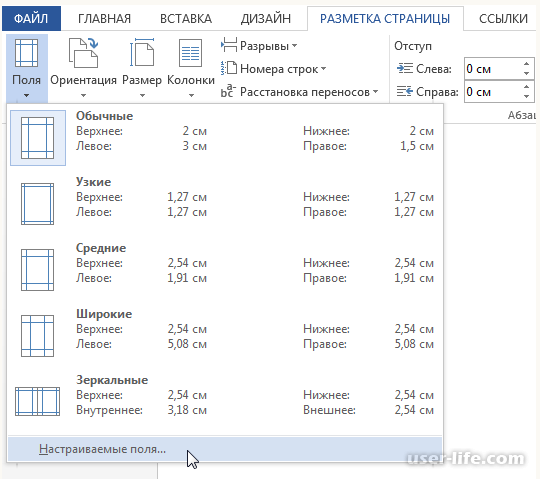
IN Microsoft Word there is an impressive range of different field parameters (sizes). Go to the link "Page layout", in the window that appears, click on "Fields".
Then a window will appear in front of the user in which you can select different variations of the field that the user needs.
This is the procedure for changing fields in a Word document.
How to set up fields?
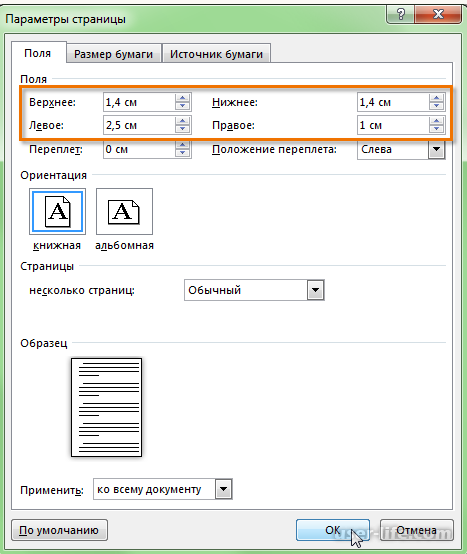
Margin options in Word are easily adjusted by changing the sizes in the "Page Setup" tab. Click on the "Fields" tab, then in the menu that appears, click on "Custom Fields".
A menu will appear in which you can adjust the desired parameters for the desired page format. Upon completion of the changes made, click the "OK" button.
The fields will be changed according to the above user parameters.
Setting the desired page size
In Microsoft Word, there are default sizes: 21x29.7 cm. If necessary, it is possible to change the size to any desired user requirements. The main thing is to know one thing, whether the dimensions set by the user are suitable for the printing capabilities of the printer in this format.
Resizing procedure
In this office program, there is a huge list of page size indicators. To resize, go to "Page Layout" and then go to "Size".
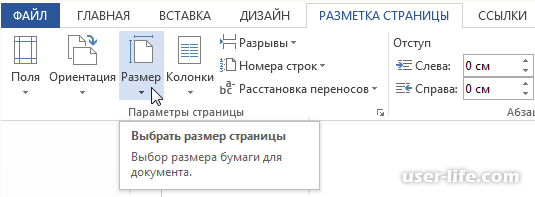
In the pop-up list that appears, you can select the desired size or see the one installed in this moment.
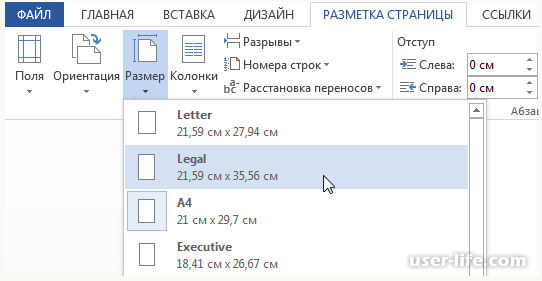
By performing these operations, the size of the Word pages will change.
Setting advanced settings for page sizes
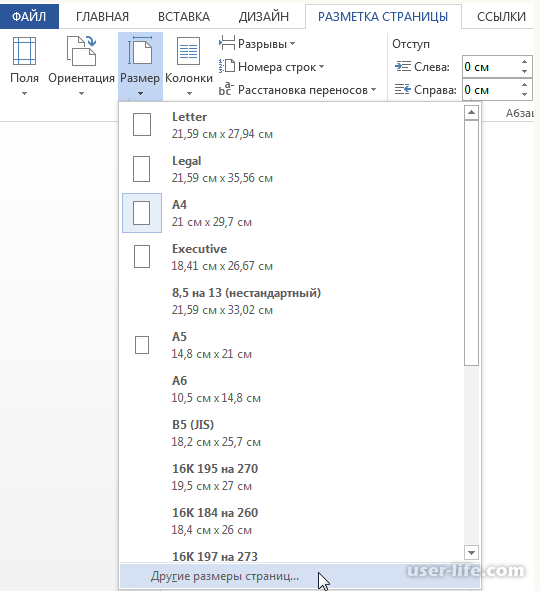
If you need to set special field sizes, you need to go to "Page Setup". Next, you should click "Size", located on the link "Page layout". The menu that appears will contain a "Other Page Sizes" tab.

Accordingly, the size of the Word pages will change.
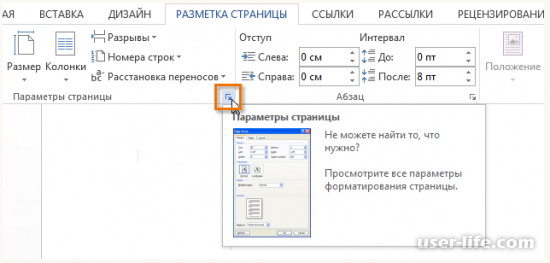
To quickly get to the “Page Setup” settings menu, you can use the image of a small arrow located with right side, at the bottom of the window where the specified Page Setup commands are.
Page settings are designed to give the document the desired look. This is true for creating almost any document - from a contract or order, to art book or scientific work. Knowing how to change the margins and being able to choose the optimal paper size and page orientation for a particular document, you will be able to correctly and beautifully format documents and save yourself from unnecessary routine work.
Setting Page Options
Page settings are set immediately before formatting and placing various objects on it. You can set these parameters at the end of the work on the document, but keep in mind that, for example, when large values margins, the appearance of the document may change significantly. Page settings are most comparable to the foundation of a building, and therefore should be set first, because all alignments in a document are tied to the page orientation and its margins. You can also configure the settings in general or by category.
Document margins
Document margins can be quickly adjusted using ready-made templates. Go to the "Page Layout" tab - click the "Margins" button and select one of the margin options.
If you need to "manually" set up fields, do the following:
- Page Layout - In the Page Setup group, click Margins, and in the window that opens, click Custom Margins. The Page Setup window opens on the Margins tab;
- In the field position areas, specify their size, the binding size in the Binding area and the binding position in the field of the same name;
- Click the icon to open the Page Setup dialog box with the Page Layout tab open in the Page Setup group.
Figure 1. Setting fields in various ways.
Page Orientation
To set the page orientation:
- Page Layout tab - in the Page Setup group, click the Orientation button and select the option you want;
- "Page Layout" - the "Page Setup" group - click on the icon for opening the "Page Setup" dialog box and select the one you need in the "Orientation" area;
- Double click on the line.
Figure 2. Changing page orientation.
Paper size
- "Page Layout" - in the "Page Setup" group, click the "Size" button and select one of the 13 blanks present.
For more fine tuning:
- "Page layout" - group "Page settings" - "Size" - "Other page sizes";
- "Page Layout" - in the "Page Setup" group, click on the icon for opening the "Page Setup" window and go to the "Paper Size" tab;
- Double click on the ruler - Paper Size tab.
Figure 3. Selecting the paper size.
Page Setup window
The Page Setup window has three tabs: Margins, Paper Size, and Paper Source.
Figure 4. Tabs in the Page Setup window.
Fields tab
In the "Fields" area, set four document fields. For standard official documents, the margins are: left - 2.5 cm (1 inch), right - 1.25-1.5 cm (about half an inch), top and bottom 1.5 - 2 cm (in some documents, the bottom margin is larger than the top) , and the maximum margins are equal: for the left - 3cm, for the rest - 2cm.
In the "Binding" list, the binding position is selected - on the left or at the top. Binding is often used in the preparation of brochures, calendars, reference books, and in ordinary documents, as a rule, it is not specified.
If you need to place two documents vertically within one document, open the list and in the "Multiple pages" field and select the "2 pages per sheet" item.
Use mirrored margins when working with two-sided documents. In this case, the left and right margins are automatically reversed on odd and even pages. To do this, in the "Pages" area in the "Multiple pages" field, select the "Mirror fields" item from the drop-down list.
In the Sample area, from the Apply drop-down list, select an option to apply the changes.
- "To the current section" - the changes made are applied only to the current section;
- "To the end of the document" - from the selected place to the end of the document. If you change, for example, the size of the margins, this will affect only the pages that are in the margin of the selection;
- "To the entire document" - the changes will be applied to the entire document.
Paper Size Tab
In the "Paper size" area, you can select the specified paper size by format - A4, A3, A5, etc.
In the "Height" and "Width" fields, an arbitrary size is set.
The Paper Feed area selects how the paper is fed for printing. It is recommended to use the default values.
The "Sample" area is similar to the one described above.
Paper Source Tab
In the "Section" area, in the "Start Section" field, you can choose where the next section will start from.
In the "Page" area, you can choose the alignment:
- Top Aligned is the default and is the most commonly used;
- "Centered" - lines of text will be aligned to the center of the document, and the text will be evenly filled from the center, up and down;
- "By height" - there is a certain similarity with text alignment in width, only in this case Lines are aligned to page height. How fewer lines on the page - the greater the distance between them;
- Bottom Align - Lines are aligned to the bottom of the page. Often used in letters and prologues to fictional novels.
In the "Distinguish between headers and footers" area, you can set the distance to the header and footer, and how the headers and footers will be distinguished - on the first page or on even / odd pages. Headers and footers will be discussed in more detail in future articles.
Default values
If you work with the same document type all the time and you want to use the same page setup, set the defaults. Go to the Page Setup window and set the options you are looking for, then click the Default button and confirm your choice. These settings will be applied to all subsequent documents until the next change.
Conclusion
After reading this article and following a series of simple steps, you can effectively customize the appearance of a document even before you start typing. This will come in handy in working with almost all documents. What's more, you'll save yourself the hassle of adjusting margins and paper size, or at least you'll know to prioritize page setup when you start working on a document. Knowing how to configure page settings will be useful to anyone who works with documents.
In Word and in every application Microsoft office it is possible to quickly obtain help (help) about all elements of the working window. For help, you can use Help (F1). When you press a key F1 the window shown in Figure 7.8 will appear on the screen, in which you can enter your question or select a topic from the list (Table of Contents) to get a list of questions on this topic.
When searching for help, it is necessary to take into account the location of the search (Figure 7.9). For example, if the computer is connected to a local network, then the default search is performed on the Internet. But if the local network does not have access to the Internet, then the search will take a long time and will not give a result. In this situation, you need to interrupt the search, specify the search location Offline Help and start searching again. As a result of the search, a list of links to help articles will appear (Figure 7.9).
When you open the Help window, the main document window is reduced in size and the rest of the screen is occupied by the Help window. When you close Help, the document window returns to its original size. In the help text within the called topic, hyperlinks- underlined and highlighted in color individual words or phrases in the text. When placed on a hyperlink, the cursor changes to " forefinger". You can jump to the text of a hyperlink with a single click of the left mouse button. To access any other topic, click on the button Show on the toolbar at the top of the help window. Then we get access to Content help. To return everything to its original state, just click again on the same button, but now it is already called Hide.
When searching for a specific help topic, you can use Question Master, which will help localize the search, and a right-click context menu.
Setting page options in MS Word.
7.4.1 Formatting (setting) the page
Formatting - change appearance, forms. Editing - changing content.
Determined by the size of the sheet of paper, the size of the margins, portrait or landscape orientation, top and footers and set with the command File - Page settings.
As a result, a window with tabs opens: Margins, Paper Size, Paper Source
tab Paper size allows the user to select the paper size. Most often, documents are prepared and printed on paper of size (format) A4 (width 21 cm, height 29.7 cm) and A5 (width 14.8 cm, height 21 cm), but you can select another size from the drop-down list or set your own size .
Right fixed size paper will give you a good idea of how the text and graphics will be positioned in the document.
On the tab fields margins are set, as well as page orientation Book(vertical sheet arrangement) or landscape(horizontal layout).
The margin is the indent from the edge of the document to the text. Margins are left, right, top and bottom. As a rule, the left margin is made larger than the rest so that when filing documents into a folder, there is space for binding.
Drop-down list Multiple pages serves to design spreads (left and right pages) and contains the following items:
mirror fields;
two pages per sheet;
Mode Ordinary created for creating documents, which are printed on one side of the paper, with the left margin always on the left.
Mode Mirror fields Designed for documents that are printed on two sides of a sheet (fold). In this mode, on odd pages, the margin sizes will correspond to the set values, and on even pages, the sizes of the left and right margins will be mirrored.
Mode 2 pages per sheet. In this mode, two pages are reduced and placed on one sheet of paper.
List Apply determines to which part of the document the set parameters will be applied (To the current section, To the selected sections, Until the end of the document, To the selected text, To the entire document).
tab Paper source contains additional features. Opening the list start section, you can choose the options for the beginning of the section: To current page, From new column, From next page,From an even page, From an odd page.
To place regular information, such as page numbers, information about the titles of sections and paragraphs of the document, Upper And Lower headers and footers (respectively, the top one is located at the top of the page, and the bottom one is at the bottom). To add headers and footers to a document, run the command View - Header and Footer, which will open the toolbar headers and footers and the document view will change as shown in figure 7.14. The text of the document becomes gray and inaccessible for editing, the cursor is placed in a rectangular dotted frame labeled as a header. Now you can edit the header, i.e. indicate in it the information that should be repeated on each page.
Changing a parameter Distinguish headers and footers in the window Page settings tab Paper source will allow you to set different headers and footers on even and odd pages. If you check the box on the position First page, then the header will not be displayed on the first page.
Vertical alignment- from the list, you can select different options for filling the sheet (Top, Center, Width, Bottom). Button Line numbering on this tab is used in some legal documents and when typing program texts.
On all dialog tabs Page settings there is a button on the bottom left Default. When you click this button, Word remembers all the settings you have made. In the future, the editor will use them for all newly created documents. Therefore, you should not press this button accidentally.
Paragraph formatting in MS Word: paragraph indents, line spacing, alignment.