Modern smartphones are equipped with a GPS chip, which makes it much easier for us to travel or find a specific address. However, it is not uncommon for GPS to not work well. And not always the poor assembly of the smartphone is to blame. You can often improve the functioning of the navigation module by digging into the settings.
Many motorists have a full-fledged GPS-navigator. Some of these devices have an antenna connector on the back wall or side end. This allows you to enhance signal reception several times - you just need to get the appropriate antenna.
As for modern smartphones, we hasten to disappoint you. In their composition, you will never find a special connector for the antenna. It is possible to improve GPS reception on Android only by software methods. If they did not work, then you will have to put up with the current state of affairs. As you might guess, budget devices work worst with GPS satellites. This is explained by the fact that they are equipped with the cheapest and oldest navigation chips, which have a low speed and a weak signal receiver.
Visiting the settings section
In many smartphones and tablets, the GPS chip is disabled by default. In this case, the device determines the location by cell towers and Wi-Fi networks. To enable the navigation chip, you need to configure the device. To do this, do the following:
Step 1. Go to the section " Settings».
Step 2 Here you should be interested in the item " Location».

Step 3 On different devices, this item may have a different name. For example, on Samsung tablets, select the " Connections” and click on the item “ Geodata", at the same time activating the corresponding switch.

Step 4 In this section, you need to enable high location accuracy. The device must use all sources for this - GPS satellites, Wi-Fi networks and data from cell towers.

It should be noted that in this mode of operation, power consumption increases. And if this is practically not noticeable on new smartphones, then the owners of budget and old devices will definitely feel the reduced battery life.
Compass calibration
If it is impossible to enhance signal reception on smartphones, then no one will interfere with improving the operation of a digital compass. The fact is that on some devices it is not calibrated, as a result of which the navigation program cannot understand in time which direction of the world your smartphone is directed. At this moment, it seems to you that the device does not catch GPS.
You need an app to calibrate the compass GPS Essentials. Download and install it, then follow these steps:
Step 1. Run the program.

Step 2 Enter the mode Compass.

Step 3 If the compass works stably, then the problem is not in it. If the compass refuses to show the cardinal directions correctly, then calibrate it.
Step 4 First, rotate the smartphone around its axis with the screen up. Then turn it upside down. Well, then flip it from left to right. This should help. In some versions of the application, you must first select the item Calibrate in section settings.
Viewing the number of visible GPS satellites
In the same GPS Essentials you can look at how many satellites your smartphone connects to. If it is large enough, then you should not blame the navigation chip - the problem is in one of the programs. To view satellites, you need to select the item in the application menu Satellites.

Reset GPS Data
A common problem with some devices is the long-term binding to specific GPS satellites, even when they have managed to leave the field of view. The application can help in this case. GPS Status & Toolbox. It will reset the GPS data, after which the connection to the satellites will be made from scratch.
Step 1. Download and install the utility.
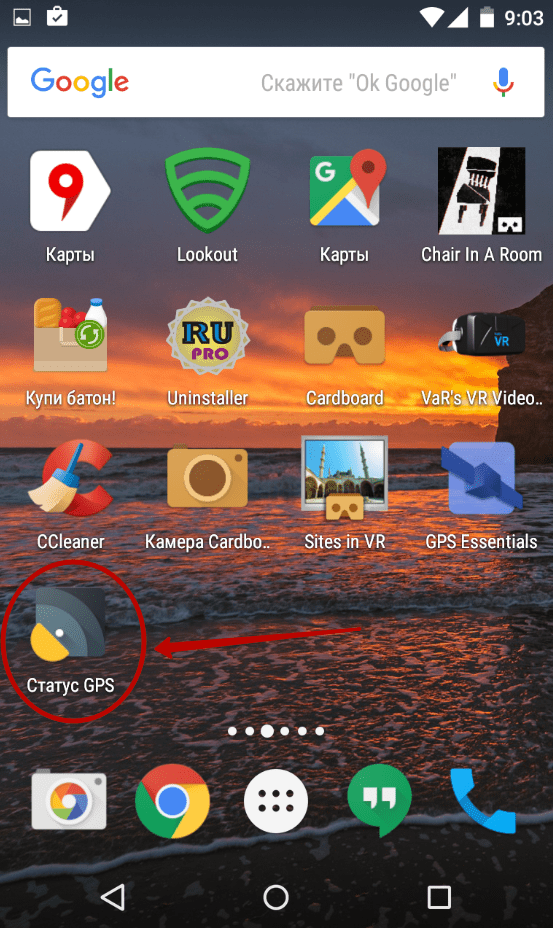
Step 2 Run the installed application by agreeing to the terms of the license agreement.

Step 3 On the main screen of the program, you will see the readings of various sensors, as well as information about the number of GPS satellites overhead.

Step 4 Click anywhere on the display, after which you can pull out the curtain with the main menu on the left. Here you can calibrate the compass if it was not possible to do this using the application discussed earlier. But now you need to click on the item " A-GPS state management».
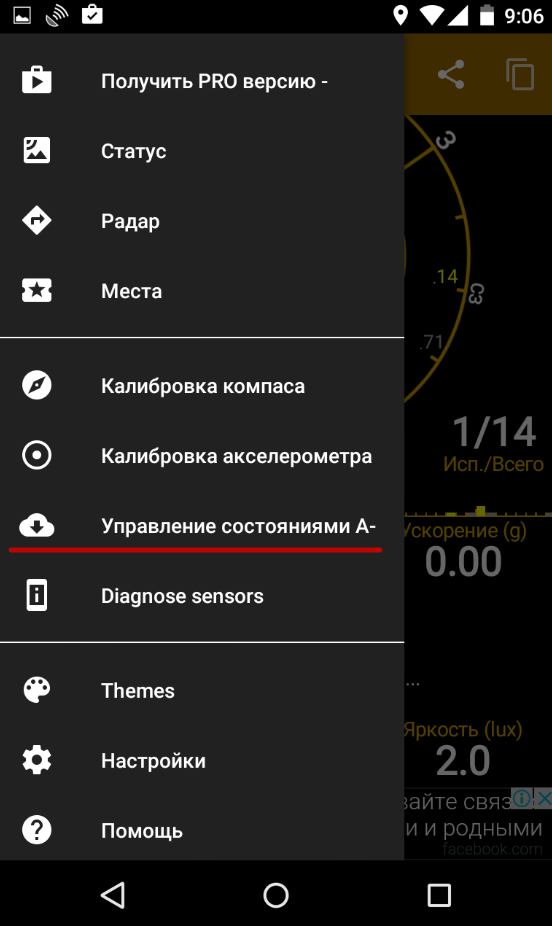
Step 5 In the pop-up menu, click the " Reset».

Step 6 After the reset is complete, return to this pop-up menu by clicking the " Download».
What to look for when buying a new smartphone?
Now you know the answer to the question "How to set up GPS on Android?". But all this will not help you much if you want to use your smartphone as a GPS navigator on an ongoing basis. It is better to get a solid modern smartphone for these purposes. When choosing it, be sure to read the full technical specifications. They need to find a mention of the support for A-GPS technology - it greatly reduces power consumption. The ideal smartphone for you will be the one that also works with GLONASS satellites. Fortunately, almost all devices that have been imported into our country over the past year have support for the Russian navigation system. But, again, you still need to look at the specifications of the device before purchasing it.
All modern tablets and smartphones have a built-in location sensor (GPS). With it, you can plot a route to the desired geographical point. This feature of your gadgets is especially good if you find yourself in an unfamiliar area. This possibility of the device has only one drawback - the GPS sensor greatly drains the battery. To help your smartphone or tablet run more economically, you can disable this feature. But, you can do smarter and properly configure the GPS sensor. In this article, we'll show you how to do it.
The GPS sensor is an important component of modern mobile devices. Indeed, besides the fact that it helps to correctly navigate the terrain, it can be used to activate reminders "tied" to a specific area. Some applications generally "refuse" to work on smartphones or tablets without enabling the location function. Therefore, you will not be able to completely disable the GPS sensor and fully use your gadget.
You can enable (and disable) GPS in the Android notification bar. It is activated with the following icon:
In order to determine the mode of its operation, you need to go along this path:

This will bring up a menu with three options:
- "According to all sources". This is the most accurate mode of your device's GPS module. But, it is this “accuracy” that wastes the energy supply of your battery. This mode uses satellites, Wi-Fi, and mobile networks to determine location. If you have this mode enabled, it means that the module responsible for the operation of this function is constantly in the active position. It monitors the space and easily helps to determine the location not only outdoors, but also indoors. Unlike navigators, devices that are used to plot routes, smartphones have the ability to use not only satellites, but also other sources. For example, the Internet. With its help, and with the help of certain utilities in your gadget, it can show the location even without connecting to satellites.
- "According to network coordinates". Actually, this mode is described in the previous paragraph. But, unlike the All Sources mode, it uses only wireless networks (Wi-Fi, Bluetooth and mobile networks). When this mode is selected, satellite communication is disabled, which helps to significantly save battery power. At the same time, the location accuracy is not critically affected.
- "By GPS satellites". Unlike the previous mode, with this mode only the GPS satellites and the device module that processes their signals become involved. By selecting this mode and entering the room, your gadget will “lose the trail”, as the signal with the satellites will be lost.

If you want to increase the life of the device from one battery charge to another, then set the "By network coordinates" mode. Also, it will not be superfluous to deactivate the location mode in the notification panel of your device.
If the battery of your smartphone or tablet copes with the load, then turn on the "According to all sources" mode. Thanks to it, you can not only determine your location more accurately, but also use personalized Google search.
Configuration through the engineering menu
Unfortunately, not all devices can quickly find satellites, connect to them and keep in touch stably. Some cheap smartphone models cannot boast of flawless operation of the GPS module. And it can come at the most inopportune moment. For example, when you need to understand where to go when you are in an unfamiliar area.
One of the causes of problems with the GPS sensor is its incorrect operation in the latitudes of our country. This is especially common with Chinese cheap smartphones. But, you can correct this situation with the help of simple manipulations with such a sensor through the engineering menu. To do this, you need to have superuser rights (How to do this? Read).
Turn on Wi-Fi connection and GPS and go to an open place. For this purpose, you can use the balcony.
Above are three engineering codes. One of them should match your device. But, if none of the listed codes fit, then use the program Mobileuncle ToolHero. With its help, you can exit to the engineering menu from devices that do not support the above engineering codes.

Mobileuncle ToolHero
In the program, you need to select a bookmark location. To do this, scroll a little to the left. In this tab, go to the item Location Based Service.

In the tab EPO need items Enable EPO and Auto Download make active. EPO is a file of your system responsible for the coordinates of the satellites and their trajectories. Initially, it is not active in all devices.

Now you need to go to YGPS(to do this, return to the previous level). In the Satellites section, you can see the location of the satellites at the moment. If satellites are visible on the diagram, then the device also “sees” them.
Go to the tab information and choose full. Wait a couple of seconds and click AGPS restart.
We return to the satellite layout again (Satellites tab). The dots next to the satellites should turn green. This means that the device can connect to them.
IMPORTANT: Sometimes, even with the correct GPS settings, the device may not always be able to connect to satellites. It may be affected by interference, bad weather and other situations.
Reboot your device. After the above steps, it should receive a better signal. GPS, find and quickly connect to satellites.
As you can see, configure the module GPS and choose the most optimal mode of operation of the function "Location" simple enough. If you have any questions regarding this article, be sure to write them in the comments.
Video. How to fix and calibrate GPS on your Android device?
It often happens that after changing the firmware on the device, or buying a new Chinese phone (sometimes not Chinese), we are faced with the fact that the smartphone does not work GPS . It also happens that GPS does not determine the location for a long time. Why is this happening?
This is due to the fact that the phone often comes to us from the other hemisphere of the planet. And he has an Almanac that is irrelevant for our area.
If your GPS is buggy, we will try to fix it.
So, I will show you how to treat GPS:
GPS + AGPS method (ROOT needed):
1) You need to enable AGPS in the Android settings, in the “My location” section, then open the top “curtain” on your phone to activate GPS.
2) Then in the dialer, you need to dial * # * # 3646633 # * # * - this is the entrance to the engineering menu.
Maybe another number will work on your phone to enter the Android engineering menu:
*#*#4636#*#*
*#*#8255#*#*, *#*#4636#*#* - for Samsung
*#*#3424#*#*, *#*#4636#*#*, *#*#8255#*#* - for HTC
*#*#7378423#*#* - for Sony
*#*#3646633#*#* - for Philips, Fly, Alcatel
*#*#2846579#*#* - for Huawei
If it doesn't work, look for information on how to enter the engineering menu on your Android phone. If you have a phone based on MTK processors (MT 6577, MT 6589 ...), you can use the “Mobileuncle Tools” program ( ROOT is required), it can be downloaded from Google Play. It has a section Engineer Mode. He is what we need.
3) When you got (by any means) to the engineering menu of the phone, you need to go to the YGPS tab - and look at the "Satellites" tab - if the signal scales appear. If yes, then the phone tries to search for satellites, but does not find it due to an incorrectly recorded Almanac. And this is not surprising, because the device came from the other “end of the world”.
4) The next step is to go to the “Information” tab, and then press the “full”, “warm”, “hot”, “cold” buttons in turn (to completely reset the old Almanac).
5) After that, on the NMEA Log tab, you must press the start button. (recording of the new Almanac will start)
6) Now for the correct operation of GPS, you need to go to the back of the “Satellites” and wait for 5-15 minutes until the maximum number of satellite scales is found (usually from 10 to 13 pieces) and their scales turn green.
7) When all satellites are found, go back to the Nmea Log tab and press the “stop” button. Congratulations, a new almanac for your area has been recorded.
I did this procedure on many Chinese phones - as a result of the procedure, the phone should start finding satellites faster.
Let me remind you that all the above actions to improve the quality of GPS must be carried out purely in open areas, away from buildings. And the last piece of advice - I recommend setting the exact system time and date in the phone.
Method GPS + EPO (need ROOT):
1) Using a file manager that supports Root and root access, you need to delete the following files: /data/misc/EPO.dat /data/misc/mtkgps.dat , /system/etc/gps.conf
2)
You need to go to "settings - location data" and turn on the GPS.
Then you need to enable EPO and download (i.e. you need to re-download - after deleting EPO.dat)
3) Make sure A-GPS is turned off. (this is mandatory!) [and cannot be turned on after, otherwise it will stop working normally]
4) Turn off the phone, pull out the battery, insert the battery, turn on the phone.
5) go to the engineering menu (see above for ways to enter) - go to the location tab - there will be 2 sub-items (location based service and YGPS)
6)
We go out into the open area, where GPS is caught as well as possible, and go to the YGPS sub-item (we don’t press any buttons!), We wait for the correction within 3-10 minutes (it takes a long time to wait).
As soon as the correction is completed, exit the YGPS section with the back button, then enter the YGPS section again. Attention is now the most important part:
When you start GPS 2, red dots (satellites) should appear, but not all at once at the same time, but every 2 seconds 1-3 pieces should appear. For example:
At the beginning 2 - then 5 - then 7 - and at the end 10 red dots on the radar.
If the dots appear gradually, then the EPO is configured correctly.
But if they all appear at the same time - EPO does not work
7) We check the operation of GPS in navigation programs.
If the navigator on the Android operating system does not work, you should not despair, many car owners have encountered this problem. This does not happen because the system is not reliable, often this can be due to a number of internal reasons for the device. The main task is to find out why the device does not work, identify the main cause and find a method to eliminate it.
Navigator on Android does not work, what is the reason?
The presence of GPS navigation modules in modern smartphones does not surprise anyone. Such an addition is often used by users for walking and cycling. This is extremely convenient, especially when traveling, when tourists wander through the unfamiliar streets of the city and simply cannot find their way to the hotel. That is why users, when choosing a smartphone for Android, prefer gadgets with a built-in GPS function.

If the navigation system does not work on a mobile device, the problem can be simple to the point of banality - the navigation module itself is disabled. However, this problem makes users nervous who have not fully understood the capabilities of the device.
Important! In order to configure the operation of the device in this case, it is enough to lower the shutter, which hides the necessary screen settings icons, the clock and the notification panel.
In the menu, you need to find the item "Geodata" and activate it with a simple click. The icon should change its color to blue, green, or orange, depending on your color scheme settings.
After performing this simple manipulation, you can try to launch the navigation program and start using it.
Fact! Some applications specially designed for Android can notify the user about disabling the ability to receive geodata. This function is necessary because it will help the user to identify the reason for the shutdown in a timely manner and change the parameters in the settings.
This is exactly what the convenient Navitel application does, which, after disabling geodata, prompts the user to correct this setting in the navigation menu.
Navigator not working: common causes
If geodata reception is enabled, and all the applications necessary for full operation are loaded, but the navigator on the Android smartphone still does not work, you need to look for the reason further. The absence of any changes may be due to the user's impatience, usually the device takes a certain time to ensure a full connection, about 5-15 minutes. During this time, the gadget downloads and processes information about the satellites available within the area, and sets its own location. 
Attention! The user should not worry, all subsequent launches will not take so much time. This happens only for the first time, by analogy with the cold start of navigators.
By the same principle, you will have to load the device if you move to another region of the country. This is due to the fact that the device needs a certain time to establish its own geographical location and identify available satellites.
Among the common reasons due to which the navigator may not work well, the following are distinguished:
- Attempts to start on the move in the car. Some devices tend to "slow down", so they need some time and immediate calmness to start.
- When you are indoors, the navigator may not function.
- The navigator may not work well in a closed area: under the crowns of trees. To establish a connection, you need to find a suitable site.
If the above manipulations did not help restore the device to working capacity, although the function worked fine until a certain point, most likely, the reason must be sought in the internal breakdown of the device. Do not attempt to disassemble the device yourself. It is unlikely that it will be possible to establish the fact of a failure, but such actions can significantly aggravate the situation, it is better to go with the device to a service center. In some cases, to restore performance, it is enough to reset the settings to the factory settings - in case the reason lies in the conflict of any programs or software failures.
Firmware as the cause of the failure of the navigator
If it is impossible to identify the problem with the naked eye, the best option is to change the firmware. This procedure is quite simple, and an ordinary smartphone user can handle it. Information for the firmware is entered on a memory card that can be placed in the navigator. After that, the device is turned on, and by holding the key, you need to wait for the moment when information about loading the software is displayed on the screen. If the device operates on Android, its logo should appear.
It is important to pay attention to the main points:
- Some manufacturers do not put the firmware in the public domain, then you will not be able to reload the software on your own. To perform the manipulation, you will have to contact the service center.
- If the device is under warranty, software replacement, as well as other interference with its operation, will void the possibility of free repair.
Very often, the failure of the functioning of the navigator on Android happens when it is necessary to replace the firmware. Users need to remember that despite the external simplicity of actions, you should be careful about downloading. Before updating, you need to charge the phone and scan the memory card with an antivirus program.
Modern gadgets are already so sophisticated that you can determine your location without resorting to the help of GPS navigators anymore. Sometimes this is necessary for the correct operation of applications, sometimes it is necessary to create the correct route. When GPS does not work on Android, this becomes difficult. What could be the reason for this and what should be done to solve this problem?
Any device does not catch well or does not catch a satellite signal at all if it is indoors. Therefore, it is better to engage in determining your location on the street. Ideally, the space should be free even from tall buildings and trees, so that the sky is completely open, so that nothing prevents the gadget from looking for a working signal and connecting to the necessary satellites.
Wrong GPS setting
All devices are endowed with two GPS modules. One is a standard receiver that can be enabled in the settings (General - Location - Mode). If you select mobile networks or Wi-Fi, the device will determine the location by towers without connecting to GPS satellites. This method is the fastest, but it does not always give an accurate result.
When you select GPS Only mode, your phone or tablet will connect to the satellites, but the device will take some time to do so. At the same time, it is desirable to be on the street in an open area, or at least put the gadget on the windowsill. It is for the operation of the second module that the correct configuration is needed. How to check if the device is receiving a signal? To do this, you will have to download and install GPS Test - a diagnostic application.
After starting the program, in the AGPS settings, select Update only, and in Settings - Keep Screen On. Now you need to return to the main program window, the GPS test will begin on your tablet or phone. It is important, however, that Wi-Fi and mobile data should neither be enabled in the Location settings nor be in use at the moment.
If the diagnostics showed that the device does not find satellites, then you should check whether the GPS settings on Android have been correctly configured. How to set up GPS? To do this, you must first download any application that can process the GPS signal. If it does not help, you need to check the settings of the communicator's COM port.
Unsuccessful flashing
After not the most successful attempts to flash a gadget or specifically a GPS module, not only the system, but simply its individual parts, for example, geolocation, may stop functioning. It is also common to see GPS stop working on a Chinese device.
To fix this situation, you need to enable AGPS in the location and GPS settings. After that, you need to enter the engineering menu through the dialing window (the combination is different for all phones). If you can’t enter it, you will have to use any special program, but already with root rights. Procedure in:
- on the Satellites tab of the YGPS tab, check if there is a signal, i.e. whether the phone or tablet is trying to find satellites at all;
- go to the Information tab and there, in order, press the buttons full, warm, hot, cold (this is necessary to reset the previous settings);
- on the NMEA Log tab, click start;
- return to the Satellites tab and wait 5 to 15 minutes until the device finds the maximum number of satellites and the GPS signal bars turn green;
- back to the NMEA Log tab, click stop.
This method is shown in more detail in the video.
Primary binding and calibration
It happens that the device is located in some remote area. In this case, it is advisable to put it in an open area for a long time and wait for the search and binding to take place.
Sometimes navigation may stop working because the compass calibration is incorrect. Such a phone or tablet will be incorrectly oriented, resulting in a problem with the GPS on the device. For calibration, you need to download a special application, GPS Essentials. After installing and running it, you need:
- Click on the compass icon.
- Select a smooth, level surface, place your device on it, and remove all electrical appliances from it.
- Smoothly turn the device around each axis 3 times.
After that, you need to try to connect again and, if necessary, repeat the calibration.
Problems with the device itself
If the gadget, checked and configured in accordance with all the rules, still does not catch satellites, only the service center will help you check the GPS settings and find the reason. It may be that the problem lies in the device itself.